One of the things I really like about the story of the Lord of the Rings, is the wealth of background information that Tolkien gave us to add context to the tale. This gives the story great depth and 'realism', through a sense of history, to the tale.
The appendices including the Tale of Years, are invaluable, and I have often found myself perusing though them.
The aspects of the histories I really enjoy are the events surrounding the Rise of the Witch King of Angmar and the battles in the far north that led to the downfall of Arnor, and the rise of the Fortress of Dol Guldur, and the threat it brought to the West.
There is a lovely sense of menace and foreboding about Dol Guldur. A sinister, malevolent cancer of a place, from which spread all manner of creepy evil creatures.
To my mind it lends itself a sense of Gothic horror, which I find wonderfully appealing in terms of story and sinister forces being gathered together.
I think part of this appeal is also the tie in with the story in The Hobbit, as here we have the Necromancer directly discussed, and it just so happens that at this time, TA ~2941, that the Quest of Erebor takes place, and the White Council force the Necromancer to abandon Dol Guldur. However, even though Sauron abandons it, it is later occupied once again by Nazgul, and forces there grow once more...
Consequently I have to say one of my more favorite SBG supplements is the Fall of the Necromancer.
I therefore present to you a Mirkwood themed battle, where a wood elf force led by Legolas, defends the Woodland Realm against an orc raiding force.
The game was played between my young son Christopher and myself.
The game was played on a 48"x 48" board, with 750 points of troops per side.
The Elves force was:
Legolas with Elven cloak
Wood Elf Captain
Wood Elf Banner
8 x Wood Elf with glaive and throwing daggers and elven cloak
8 x Wood Elf with spear, throwing daggers and elven cloak
8 x Wood Elf with Elf Bow, throwing daggers and elven cloak
Radagast the Brown.
I decided to include Radagast to give the elves some magic support and felt Radagast was a likely themed choice given the potential threat to his dwelling at Rosgobel in the western eaves of the forest.
The orc raiding force was huge by comparison:
Orc captain with shield
2 x Orc shamen
Orc banner
8 x Orc with bow
9 x Orcs with shield
7 x Orc with two handed weapon
8 x Orc with spear
Spider queen
4 x Giant spiders
2 x Giant bats
Wild Warg Chieftan
6 x Wild Wargs
Christopher commanded the elves, and deployed them 6" in from his board edge. He set up a line of elves centrally with Radagast and banner, with Legolas off on left flank with some elves, and the captain with more elves on his right flank. Both these flank forces were trying to occupy woodland, which would hopefully catch the orc force in a crossfire of arrows.
I split my orcs into two bands, to go round either side of the large woodland in front of my centre. The spiders went down the right flank and the wargs down the left. The bats were positioned to fly over the central woodland.
Before we get the battle underway, I thought I'd make some comments:
I wasn't out to annihilate my son, and tried to help him with some of his movement decisions. Also I didn't play aggressively with might points, nor calling heroic moves etc, but allowed him to do so normally.
Also in regards terrain, and particularly "area terrain" like woodland. Whilst the area is considered difficult ground, I find it too fussy to have to have each tree where it is, and work out vision and in the way shots for each tree in turn. So I made the call that, woodland blocked LOS to troops either side of it. But troops in it can see out and be seen in, or through it by other troops in same terrain feature. All such troops in area terrain could claim benefit of cover, of one in-the-way shot, needing a 4+ to get past the woodland cover.
We also forgot many things that may have helped our forces, like banner re-rolls, and I having got 2 shaman into position through the game with Fury cast, kept forgetting to implement its affects... It's tricky when you are having to do the thinking for both sides, take pictures and write report notes... The main thing was we played an enjoyable game, and you get to read a report with some nice pictures!
Also, the army lists may not have been killer lists either, but I prefer to play with painted troops, and used what I had painted up.
To Battle!
Turn 1: Priority to Elves.
The elven captain and a small group of bow armed elves advanced into the eaves of a wood on the elven right flank. The central group of elves re-aligned themselves slightly, and Radagast cast Terrifying Aura on himself.
The evil forces advanced broadly, with wargs led by wild warg chieftain down evil left flank, spiders and spider queen down right flank, the two mobs of orcs moved down either side of central wood, and bats flew forward into cover behind wood. Both orc shamen fail to cast Fury!
Turn 2: Priority to Elves.
Legolas leads a small band of elves into eaves of woods on elven left flank. The rest of the elves stay in position. The evil forces continue their advance, with both orc shamen successfully casting Fury.
The elves begin shooting; a volley of five shots is aimed at the wargs but they just hit trees. There is more success from Legolas's group of elven shooting as they slay a spider.
Turn 3: Priority to Elves
The elven bow groups adjust their position along inner eaves of the two woods, trying to get better shooting positions on the advancing evil forces. The wargs skirt between marsh and wood. The spiders race into woods, unimpeded by the terrain. The bats fly to the front. The orc mobs continue their advance.
More arrows fly killing another spider, wounding a bat swarm, and a thrown dagger hits the wild warg chieftain, but this is saved by a fate point.
Turn 4: Priority to Elves
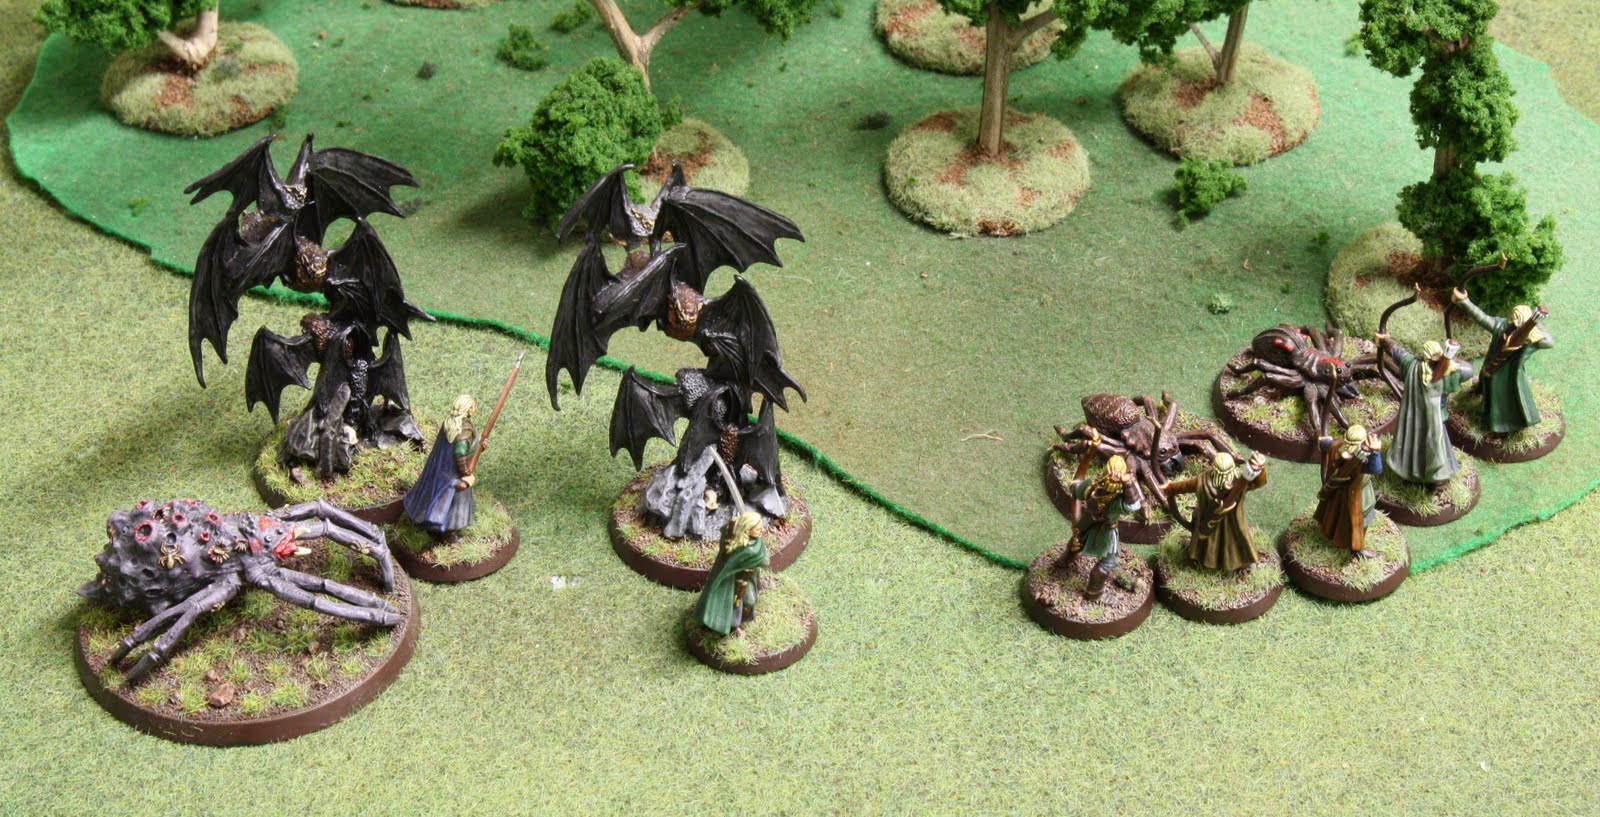
The elves adjust position slightly again, trying to best get into position to receive the evil advance as best they can. The wargs rush on heedless, and two more are dropped to elven bow fire. The spiders manage to see the elves now through the woods having closed in, their elven cloaks no longer hiding them from view at his close distance, and two spiders manage to charge the elven bowmen. The Spider Queen and bats also now get in on the action, charging a lone elf. All the elves caught in melee are slain this turn.
Turn 5: Priority to Elves.
A crucial turn! Legolas charges Spider Queen, with spear support, and an elf with glaive intercepts a bat swarm. However the second bat swarm flies over to eliminate the spear support. The elven bow line pull back from spiders in the woods. Radagast advances and casts Aura of Dismay. (This seemed a great spell to cast at this point to save elves from being over run - we had forgotten the effects of Fury would have made this void, but never mind...!) The elf captain charged the wild warg chieftain with a spear support, as the other elves back off into the woods. The rest of the elven central line advance to protect Radagast. Two wargs manage to charge in but spiders fail their terror tests. The bats fly forward.
Legolas calls a Heroic Combat versus the Spider Queen and slays her, using up might points. He follows up into bat swarm, and beats them back wounding them twice. The second bat swarm is also beaten off. The elf captain beats back the wild warg chieftain and it is again saved by a fate point. More fighting sees antagonists square off but nothing more killed this turn.
 |
| Legolas fights and slays Spider Queen |
|
 |
| Elf captain fights off wild warg chieftain |
Turn 6: Priority to Orcs - finally!
Radagast calls a Heroic move and cast Aura of Dismay again. The elves fall back allowing evil advance into a barrage of throwing daggers dropping three more orcs and one warg. The elf captain is caught in a fight with wild warg chieftain again but he still has his spear support. Legolas on the left flank with help from four elves, tries to deal with remaining two spiders and two bat swarms.The elven captain beats off the wild warg chieftain using his last might point and wounds it twice. Legolas beats off and disperses the weakened bat swarm.Another elf wounds a spider while the remaining bat swarm pushes back its elven opponent.
Turn 7: Priority to Evil
Radagast calls a heroic move again with his last might point and again casts Aura of Dismay. The elves fall back around Radagast to base of the board - there was no where else to go, and they were hemmed in by the "edge of the world effect". In reality they would have continued to fall back using throwing daggers and bow fire. But that would have meant leaving the 'battlefield' and the game to the evil forces. So they stood their ground. Elven daggers drop another orc, and Legolas shoots another dead. The wild warg chieftain suffers a mortal blow from a plucky elf with spear support whilst the elf captain slays an orc. The remaining bat swarm and a spider each kill an elf.
Turn 8: Priority to Elves
Legolas runs to hide in woods, and a lone elf retreats pursued by remaining spiders. The four remaining elven bows on right flank withdraw, drawing wargs after them.The elven line retreats to board edge as orcs close in. Radagast Immobilizes bat swarm. One of the wargs is slain by a throwing dagger, and another is beaten in combat. One orc is slain in fighting, as two more elves die in the line, and the two spiders catch and kill the lone spear armed elf.
Turn 9: Priority to Elves.
Legolas retreats further into wood, drawing 2 orcs after him, he shoots one dead. The elves on right flank now close in and surround remaining warg. The trapped central elven line take a 'do or die' attitude and charge into orc mob, as it cannot retreat further. The orc archers, who thus far haven't hit a thing, finally drop a lone elf. The final warg is overwhelmed. Two more elves die in the fighting line, as Radagast beats back the orc captain, wounding him once. More elves fall in the melee, taking them to their break point.
Turn 10: Priority to Orcs
The orc captain and two orcs fail this time to charge Radagast, which blocks up end of orc line for further movement. One elf runs off having failed his courage test. The rest of the orcs pile in against elven line, it begins to get ugly for the elves. Radagast Renews a might point to the elf captain. A spider and two orcs die in the melee, taking the orcs to their break point.
 |
| Radagast strides forward casting Aura of Dismay |
|
 |
| Radagast fights off the orc captain |
|
Turn 11: Priority to Orcs.
With both sides now broken, we fight a final round of combat where three more orcs die, but elves finally surrender, realizing they cannot hold off the inevitable. It was at this point we had remembered the effects of Fury from the shamen, and the orcs were not going to run away, which the elves had been hoping for!
In Conclusion
We both really enjoyed the game, and I think looking back I think Chris should have formed his elves up into a solid firing line from the start, rather then splitting his forces early on. He probably could have got two better rounds of shooting off early on which may have made a difference, perhaps dropping more wargs and spiders earlier which could have made a difference later on.
Great fun and Chris is keen to try this out again, to try this tactic.
In fairness to him though, his tactic wasn't too bad and was probably influenced by this thoughts of woods elves fighting in the woods and his experiences playing the Total War series of computer games where he gets an idea of battlefield tactics. I think he did pretty well, especially maintaining his interest in the game, (helped by him wanting to be in the photos, so that kept him interested too!) which lasted over several evenings. Bed times come quickly when you are seven years old and having fun.
I hope you enjoyed this battle report, they take a surprising amount of effort to do; taking pics, keeping notes through game, then putting it all on to blog post! Several hours that could have been spent painting! ;-)