Showing posts with label House. Show all posts

Sunday, May 12, 2013

Victorian Terrace - WIP6 - "Chim Chim Cher-ee" , chimneys, details and more straightening...

More work on the Victorian terrace...

Prior to this weekend I had added the doors and window dressing... This weekend I have added the chimney stack ends.  The doors were just two layers of thin card with the outer layer with holes cut in for the panelled effect. The window net curtain effect is two layers of wedding voil material glued at right angles to each other as the material has a pattern to it.


The chimneys were 3 layers of 3mm mdf cut to size and shape with the outer layer trimmed to fit the top peak of the gable end... Another thing I should have done from the out set from cutting out the gables.

 Click play on above video for some themed(?) musical accompaniment.

Once PVA'd into place and glue dry I clad with more DAS clay... its still drying hence it looks darker than rest of building. Once dry I'll etch in the brick pattern again. The chimney pots are Evergreen styrene rods cut to 1cm lengths and glued to top of mdf before clay blends them to top.

The need for chimneys was one of the reasons I didn't put windows in the building gable ends, otherwise it wouldn't look right...


More close up views of windows and doors at front of building...A little greenstuff filled any small gaps at top of doors. I have also added clay to corner building joints and will need to etch in more brick work here too.


At the rear the clamps are out again, to straighten the rear walls of the yard... The middle piece of mdf is just there for tension to force walls straight as they dry and is not glued in place so will be removed. The rear wall panel with gates is gluing into place.

I need to add the gates once this is done and, am busy cutting out pieces to make the W/C and coal store for back wall of yard...

That's all for now, back to painting German FoW...

Sunday, April 28, 2013

Victorian Terrace - WIP5 - Window panes and more warp repairs, Mr Scott!

Now the warping has been attended to for the most part on the front and rear panels, it was time to press on with some more modelling work, and I decided the next thing to do would be to add the window panes. This was simply done gluing to the back of the panels an over-sized piece of plastic, cut from the blister packs all the figures come in... simple... Once this has dried I'll add some mesh for a mesh curtain effect...


And some more warp fixing, on the gable ends...

More to follow, now the warping has been fixed and brick surface has been etched, hopefully I can press on with some better progress, stay tuned...

Thursday, April 25, 2013

Victorian terrace - WIP4 - Brickwork finished and warp repairs, Scotty!

Well ANZAC day saw me raise a beer in the memory of out Gallant Servicemen, past and present, and I was happy to enjoy a day off in their honour...

A fairly dismal day on the weather front got me out of any garden duties, and with wife and kids all nursing the sniffles, no-one was particularly in a mood to do much, so I got back to the brickwork scoring.

I found my old etching tool I made a while back when I built the Weathertop model, which worked much better than the long steel pin I was using the other night.

The tool I had previously made with the handle from a kids old large craft paintbrush, into the end of which I drilled a hole and glued into place a short length of wire from an old wire clothes hanger  that I hand cut a piece from. I made a point at the end with an angle grinder.

So I had the Sherlock Holmes movies on back to back as I sat and scored and etched away... By the last gable end I was getting a bit tired of it all in one day and made an error on a set of score lines,...Greenstuff came to the rescue, and I pressed on to finish...


Having finished that, I made a start sorting the warped pieces, clamping them to a workbench and gluing a wide strip of MDF across the back. I'll leave this a good 24hrs to fully dry before taking the clamp off.


The rear frontage is also getting done at the same time, then I'll do the gable ends. While the front and back pieces are gluing, I have also taken the chance to glue into place the plastic for the glass window panes... more pics to follow...

The rest of the day, was back to painting my FoW German pioneers. They did quite well in their first outing, but sadly the rest of my force was not best positioned to exploit the hole they made... ah well, maybe next time... 

Wednesday, April 24, 2013

Victorian Terrace - WIP3 - Brickwork

A couple more update pictures. Last night I set to, etching in the brick pattern into the building sides.

I had hoped to get them all done last night... Ha ha ha , who was I kidding... it took me all night to do one piece.

So this is going to take a little longer than I hoped... But I think the effect has been worth it.

Ideally I would have liked smaller bricks, but I quickly realized it was going to take a while, so I widened my initial score lines. I had thought one swipe of the etching point would be sufficient, but the clay has dried surprisingly hard and each score line took multiples passes back and forth.

[With the next building, I may try scoring the clay before fully dry.]

Plus I guess most wargaming modelling is a little abstracted in scale so I am not too concerned, I think it gives the right impression of regular brickwork... I hope you agree !


The other issue with the clay drying, is that it has warped the MDF slightly as it has dried. I hope I can get it to go back straight, gluing more internal MDF panels edge on and clamp it while the glue dries, pulling it back into shape. I have already flexed the boards back flat and clay didn't crack so no problems there.
Same with putting the building on a base - as you can see the yard walls have warped quite noticeably too.


Oh well, progress and problems, we'll get there eventually. If it doesn't work out, then it's at least been an interesting exercise and hopefully I have alerted others to some of the difficulties you may encounter.

Ideally I would have liked to have used some kind of dense foam sheet, for the brick scoring, but I have not found a 100% suitable one yet. I thought I had with the depron foam, but making the cemetery walls I noticed even this didn't score in well, but snagged and tore a fair bit...

No work tonight as I have a game on with Paul (Flames of War), but I have a day off tomorrow for ANZAC day here in NZ, so I may get a little more done then.

Till next time...

Tuesday, April 23, 2013

Victorian Terrace - WIP 2 - clay cladding

A quick couple of update pictures. I got the building panels clad in DAS clay last night. Admittedly it took a few hours, the most fiddly bits getting it neatly round the windows and doors, so as not to obscure the matchstick frames.


Unfortunately my idea of the lino roller didn't work out. It's quite a stiff roller and you need to push down firmly to get it to roll. So it either gripped the clay and lifted it, sticking to roller, or, after I had put some lubricating cream on the roller, it just slid over the surface without rolling.

So I just resorted to firmly pressing it down with my fingers, having first teased the clay out into small pieces as thin as I could manage. Then just rubbed it down smooth with wet fingers, with a small bowl of water to the side as I worked. I used a small scultping tool to scrape the excess away from the window and door frames.

So the clay layer is probably only a few mm's thick, and adhered easily to the MDF surface. So long as you keep your fingers wet as you work it doesn't stick to you too much.


So this should be good and dry when I get in tonight to etch in the brick pattern.

Monday, April 22, 2013

Victorian Terrace - Empire of the Dead - WIP - MDF structure

With the immanent arrival of my Requiem kickstarter figure allotment for Empire of the Dead, in June /July, I decided I had better get cracking and try and clear the backlog of outstanding figures I still have for this game.

I still have 3 Police Inspectors, 4 London Gents and a few civilians to paint up. These are all from the Vampire Wars Range from Westwind. I got these all prep-ed, based and undercoated, so good to start painting.

I also realised I must make a start on some appropriate Victorian urban setting buildings, and decided to make a start on a simple terraced block.

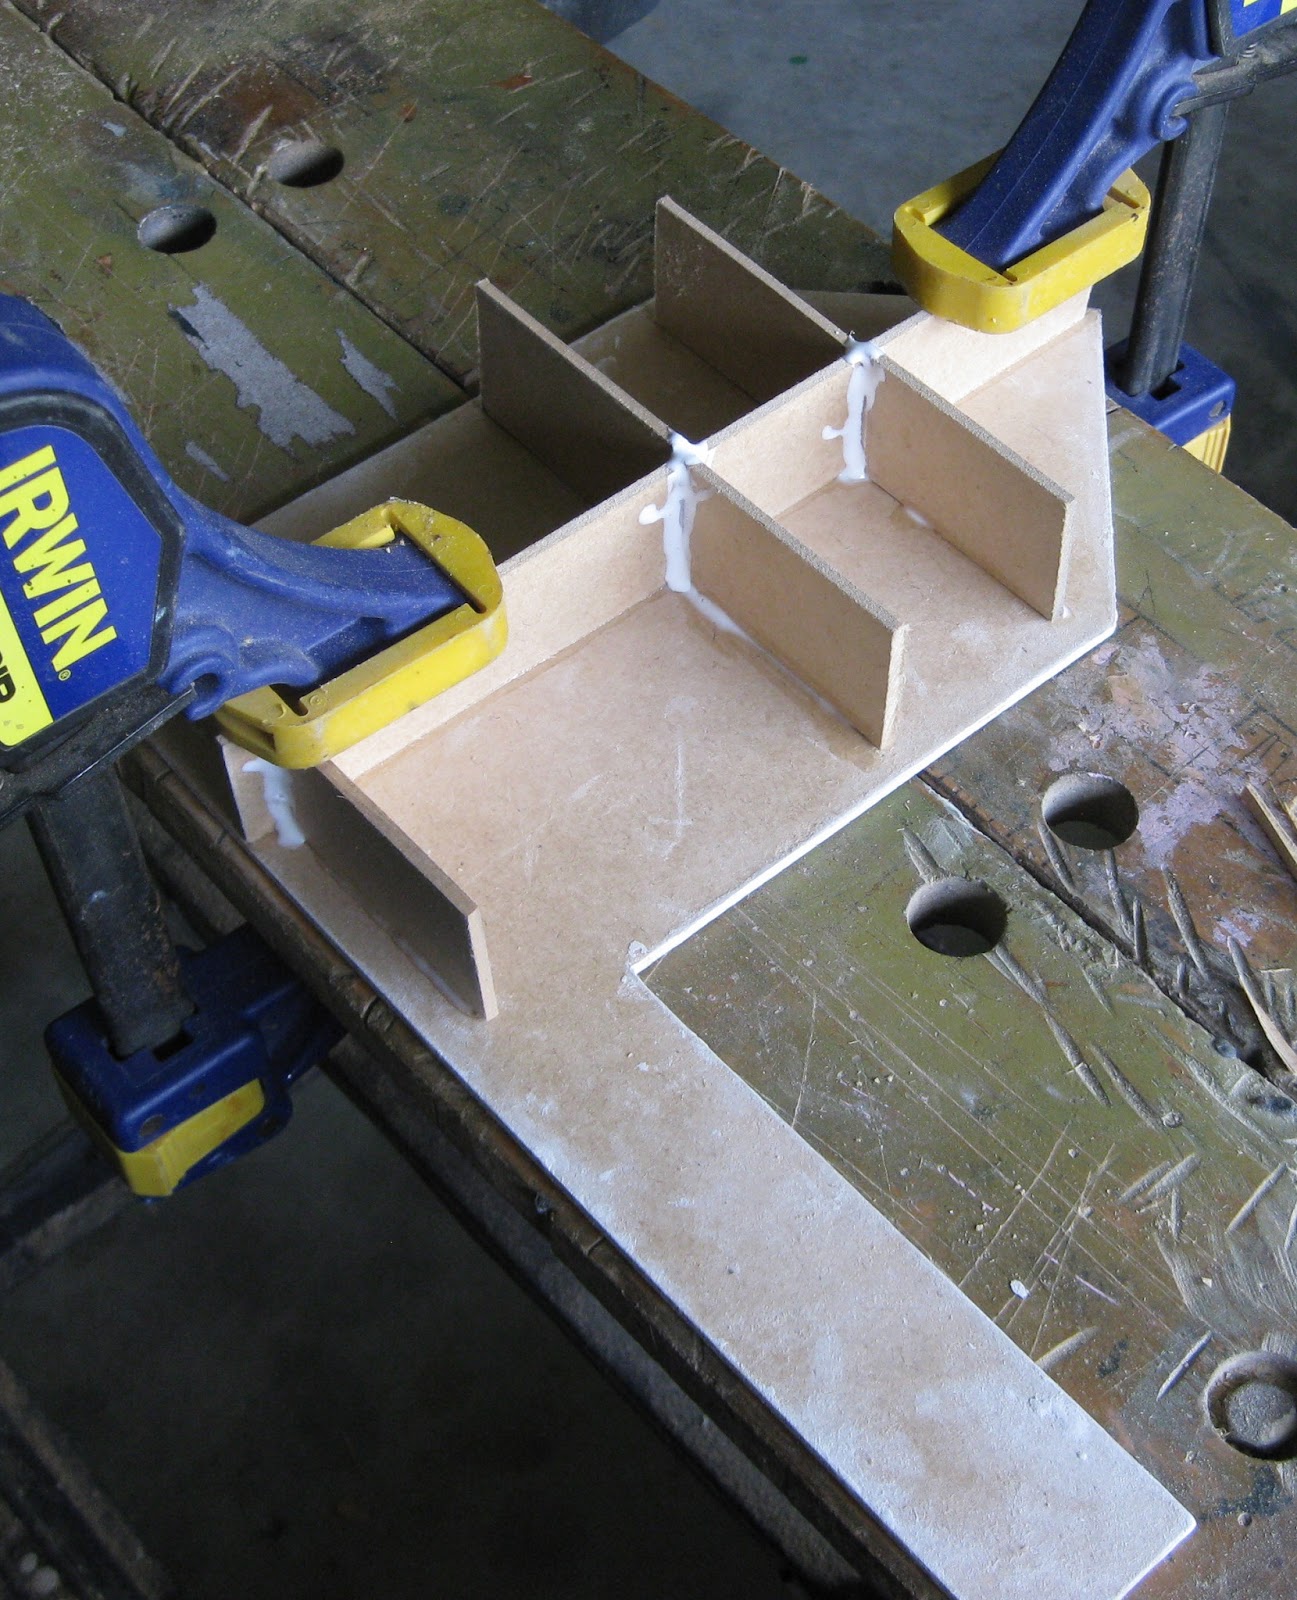
I used 3mm MDF sheet, as it's cheaper than foamcore, and more sturdy. It is admittedly a little more difficult to work with than foamcore, but you can still cut it with a sharp Stanley knife though it will take several strokes.

Here's what I have managed so far, all cut out with a Stanley knife and steel rule.


The idea being its two houses terraced together, with a walled yard at the rear. The two yards will be separated by a wood fence (balsa/matchstick construction). The rear yard wall, yet to be done will have rear gates for access to a rear alley way. I may also add a coal bunker and outdoor W/C adjacent this back wall too, for each yard.

I grew up in one such Victorian terrace in the North of England, as a kid, so know their layout old, and new... Thankfully ours had an indoor loo in my time, and the rear yard had been converted to a garden but I could see across to the neighbors and they still had the outbuildings on the back wall intact...


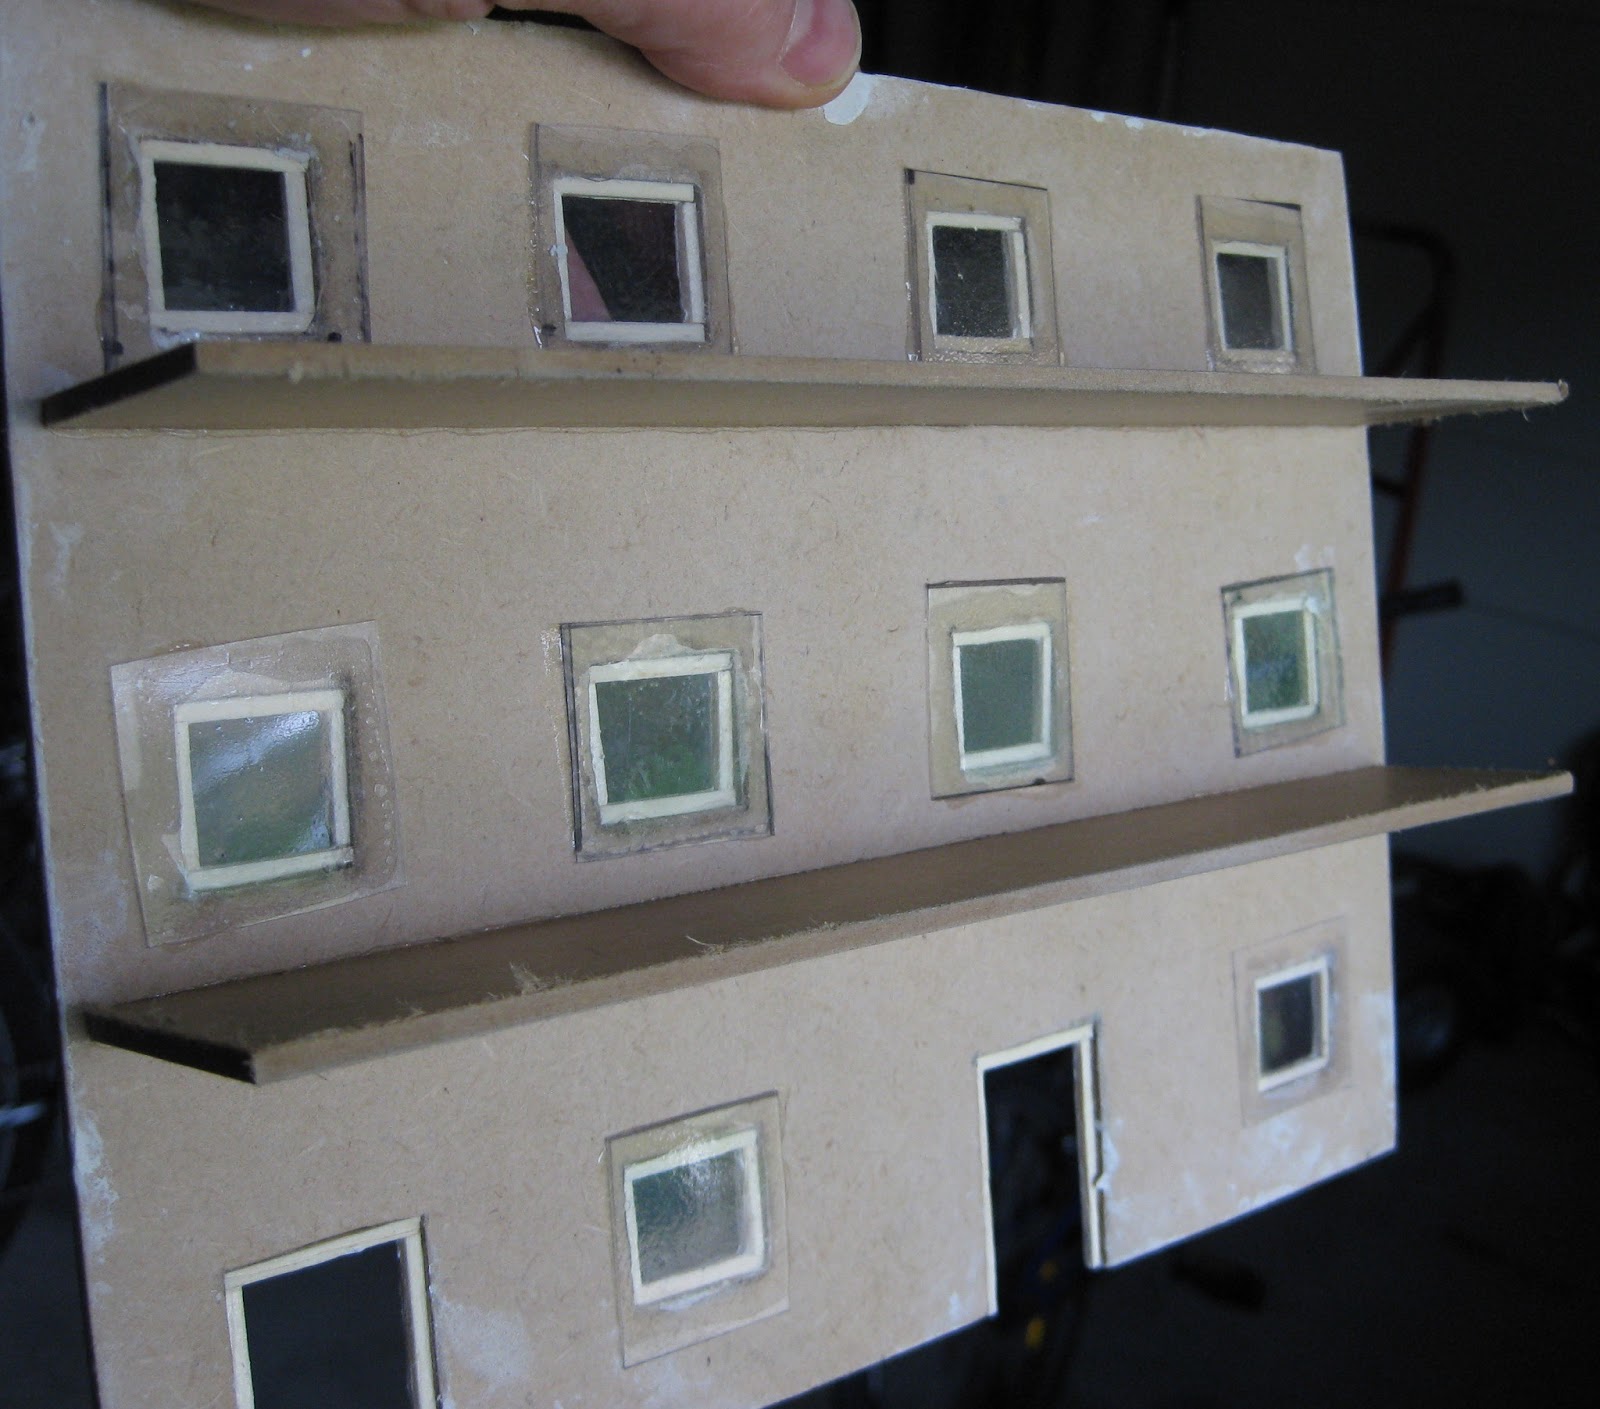
So far I have managed to cut out the basic shape and have done the window frames and door frames with cut matchsticks. I have just gone for a very simple small square window for these humblest of dwellings...

The plan is then to clad the exterior, with DAS modelling clay, and roller this smooth ( I got myself a small lino roller) . Once dry I will etch in a brick pattern. No doubt this will be laborious, but I can't think of a better way...

I am going to do this to each building panel, then assemble the building, and fix up the joints with more clay, and etching.

In effect, this is a test case building construct, to see if these techniques are going to work and how long they will take to do.


A Victorian gent shown for scale.

The building is 24cm wide at the front and  I have allowed 6cm per story, with a further 7.5cm for the pitch of the roof. ( I recall the ceilings in the house I used to live in were very high). The depth of the building is 15cm and another 15cm for rear yard.

So far this was an afternoons work.

So perhaps while laborious to do, at this 'footprint' size it won't take too many to fill up a 120cm x 120cm board, with space for alleys, pavements and roads in between....

For the windows, I plan to use some clear plastic cut from the blister packs all the models come in), glued to the inner surface. I have some white wedding veil material, this I will cut into small strips and again glue onto the inside of the clear plastic to effect a mesh curtain appearance. Then some black paper behind that to blank out the view into the building.

I pondered doing lift of roofs and internal floors, but I think this will become too messy to play, and if figures actually enter a building in the game, I'll switch the action to a separate floor plan to side of main table.

I am also pondering having little lights inside that will give a glow from the windows... I'll have to check out how best to do this with Joe, who's quite clued up on this wizardry!

If all goes well, I would hope to do a few more of these. I'd also like to do a corner public house, shops, perhaps a police station, some warehouse type buildings, may be a church?... We'll see how I go, grand plans and all that!

However as normal I have several things on the go at once, there's still 13 dwarves staring at me from the painting table, and a bunch of FOW stuff; 3 Universal Carriers and 3 Stuarts just awaiting decals and final varnish, a Typhoon that's long overdue finishing off to add to my XXX Corp, and I just got a pack of Pioneers to give my German grenadiers some extra help, these are about 50% base painted now... Busy busy as always!

So this building and all those figures are vying for my time...
Related Posts Plugin for WordPress, Blogger...