Ha... think you can out expand me eh? Well we'll see about that... Take that! And this! Ha ha, not so clever now are we? Biff, bash, cut, hack, slash and saw!
Actually it was mostly saw and sand! But it worked...
Once set the material is fairly easy to work with. The outer skin is crusty , whilst the inner surface still retains a slight spongy quality.
So after a bit of work, we are back to this...
I had to be little careful during trimming so I didn't cut the ends off the uprights, just still visible poking up through the surface.
OK next job will be to clad the sides of the board in more MDF, for rigidity and strength and then skim coat the whole top surface in polyfilla. After that sand flat and smooth and, well... I still want a cobblestone pattern over the whole board... and am still leaning towards etching a pattern in with the dremel... it will probably take an age, but should look good in the end...
Cobblestones
I haven't found a cost effective way of covering the board in a suitable pattern. Several suppliers do cobble patterns in pre-made pieces or molds to make yourself... but these cost the earth in pre-made pieces to cover this size of board, or the rubber latex mold making material and then casting material will all add up and probably end up taking just as long to cast it all and fit it all together...
So I think the dremel will be the cost effective way to go... time will be the only factor...
Smoke
On the smoke making front I have run into a slight problem - getting the dry-ice. BOC in Wellington sell it, but thats 50kms away, and they are only open Mon-Fri , the same days I work. When I am free to go down at the weekend to get it, they're closed... what a pain! Shame I can't just nip down to the local store and grab a pack when I need it... curses! Plus even if you can get it, its time sensitive stuff due to storage conditions... it literally goes off. You cant keep it in the domestic freezer either as it could knacker the thermostat... it seems really a buy and use immediately type thing, which is tricky with the supply situation here...
I looked at another way... CO2 fire extinguishers can be used to make dry-ice; just wrap a pillow case tightly round the nozzle and set it off, the pillow case catches the dry-ice formed coming out the end. But CO2 extinguishers are not cheaply or locally available either...
So I am now exploring smoke machines... these things seem to run on 'fog juice' which seems to be a mix of distilled water and glycerin, both of which I can get from the pharmacy. Heat this mix up and it gives off smoke vapours... I'll have to have a play about and see what I come up with...
I have also made a start tonight drawing out plans for the corner pub/tavern... Just need cutting the bits out of the MDF sheet now and start putting it together...
[UPDATE - Millsy suggested split peas for cobblestones so I went to grocery store to have a look. I thought the split peas were too big, but did find some red lentil that looked a smaller better size - I'll have a play with these]
Tuesday, December 03, 2013
Monday, December 02, 2013
It Lives...!
It lives master, it lives... heck, that's what it feels like using this stuff...
With the poly sheet and piping glued down I decided to fill the void around the pipe with expanding foam filler... I'd used a can of this ages ago, thinking it might create some rather cool cliffs I could carve and sculpt, but I found it too uncontrollable, when used without a controlling frame of reference... and ended up with a huge uncontrolled and unusable 'blob' and just biffed it in the bin... that was quite sometime ago... I do recall it made a right mess and was a bugger to try and clean up, darn stuff seem to stick to everything...
So with that vague memory haunting me somewhat I set to again, read the directions... yeah I know, men don't read instructions ;-)... and even read the ones on the can of clean up spray I got too...
With latex gloves on, and hearty high ho silver, I let rip... is that it...? OK squirt a bit more... still seems a bit thin and hasn't reached the top of the poly sheet yet... hmm, squirt a bit more ... there that'll do... OK clean up time... wahay this stuff is pressurized spray acetone... wee ...nice smell, splash it on all over, eh 'arry? 'arry? Wheres 'arry?
Thank the Gods I had opened the windows, or I'd be floating round the ceiling somewhere...
Anyhoo... I got cleaned up so I can use the rest of can for something else... gave it half an hour or so, (drying time on can) and came back, and its swelled like you can see below!
... by the end of the night, its just about doubled in size again... I foresee a hearty time with the bread knife and dremel tomorrow! Wish me luck!
If your gonna use the one on the left, make sure you get the one on the right as well! You have been warned!
Oh, and you can probably use about half the amount you think you're gonna need, coz yep, it expands, ...just not instantly...
With the poly sheet and piping glued down I decided to fill the void around the pipe with expanding foam filler... I'd used a can of this ages ago, thinking it might create some rather cool cliffs I could carve and sculpt, but I found it too uncontrollable, when used without a controlling frame of reference... and ended up with a huge uncontrolled and unusable 'blob' and just biffed it in the bin... that was quite sometime ago... I do recall it made a right mess and was a bugger to try and clean up, darn stuff seem to stick to everything...
So with that vague memory haunting me somewhat I set to again, read the directions... yeah I know, men don't read instructions ;-)... and even read the ones on the can of clean up spray I got too...
With latex gloves on, and hearty high ho silver, I let rip... is that it...? OK squirt a bit more... still seems a bit thin and hasn't reached the top of the poly sheet yet... hmm, squirt a bit more ... there that'll do... OK clean up time... wahay this stuff is pressurized spray acetone... wee ...nice smell, splash it on all over, eh 'arry? 'arry? Wheres 'arry?
Thank the Gods I had opened the windows, or I'd be floating round the ceiling somewhere...
Anyhoo... I got cleaned up so I can use the rest of can for something else... gave it half an hour or so, (drying time on can) and came back, and its swelled like you can see below!
... by the end of the night, its just about doubled in size again... I foresee a hearty time with the bread knife and dremel tomorrow! Wish me luck!
If your gonna use the one on the left, make sure you get the one on the right as well! You have been warned!
Oh, and you can probably use about half the amount you think you're gonna need, coz yep, it expands, ...just not instantly...
Saturday, November 30, 2013
A foggy day in old London Town! - WIP - Empire of the Dead base board
With Curts painting challenge approaching, over on Analogue Hobbies blog, I have been hard out all week prepping stuff to paint for the challenge... So far I have 5 15mm PSC Panzer IV F1's, a Battlefront 15cm sFH18 Howitzer battery of 4 guns, another pack of Battlefront Begleit Tank escorts, for my StuGs, my Hobbit set of 13 Dwarves and Radagast have been rescued from the back of the painting table, and I made a start on my Requiem EotD stuff, prepping the Gentlemen with Guns, Lycaons, and the character pack of Dracula, his brides and Renfield. I've also done the 4 40k terminators to go with the test Das Reich terminator I did sometime ago...
So if I get through that little lot over the next couple of months I will be thrilled. I am keeping an eye on the fortnight theme aspects of the challenge too, and have some ideas for civvies, casualties etc...
After all that figure prepping, I thought the weekend, should give me a little time to work on terrain, and a wet and windy Saturday gave me a perfect chance to make a start on my Empire of the Dead London base board...
Now since some fine fellows suggested I should try and add some fog effects to my terrain board to go with the Building lights and Gaslamps I did, I thought I had better make a start...
I got a sheet of 5mm MDF and a 2" think sheet of polystyrene, cutting both to 48" x 48". I also got some 15mm dia plumbing pipe, with simple screw-fit connections, and made a start on a piped sewer system. I blanked off the ends of the pipe and added an upright to each that will just stick up proud of the poly sheet for now. This will be covered with a pastic mesh that will look like a drain cover...
The pipework will allow dry-ice to be pumped into the game, giving a foggy ground layer to the game.
Here's the pipework in place, on the MDF sheet.
I also used the pipework as a template to cut out the poly sheet...
Then the pipework was glued into place, and the poly sheet glued down around it. This will all dry overnight, giving the PVA glue a good chance to dry out. The books weigh it all down while it sets... I knew all those rule books, supplements, magazines and history books would be good for something! ;-)
While all that is drying... I finished off my 'smoke machine'... an empty 900g powdered food tin, a 2.5" 2nd hand computer case fan, a 9v battery cap connector was soldered to this, to power it up, glued to the plastic lid of the tin, that I had cut a fan sized hole in, so it blows down into the tin. An off cut of plastic pipe, and a bought piece of flexible pipe from the plumb shop, and we are ready to go... hot glue and insulating tape finishes it off...
...so this is all connected to the pipe 'sewer' system, via a screw fit straight connector... all I am waiting for is a test run...
...I need to get some dry-ice... the trick is, put some boiling water in the tin, drop in some dry-ice, put lid on and whack the fan on and, hopefully, hey presto - a smoke laden gaming board...
...for the chemically curious among you, the dry-ice, sublimes, i.e. goes from a solid, straight to a gas, missing out the liquid phase... to create a cold ground hugging fog effect... common to all those 70's pop group stage videos etc. and cheesy horror movies...
Warnings! - the dry-ice is seriously cold ( −78.5 °C), handle with thick gloves to avoid frost burns, oh and the gas is CO2, so open the windows too, to avoid hypercapnia!
If I get it all to work, I'll upload a video... fingers crossed!
So if I get through that little lot over the next couple of months I will be thrilled. I am keeping an eye on the fortnight theme aspects of the challenge too, and have some ideas for civvies, casualties etc...
After all that figure prepping, I thought the weekend, should give me a little time to work on terrain, and a wet and windy Saturday gave me a perfect chance to make a start on my Empire of the Dead London base board...
Now since some fine fellows suggested I should try and add some fog effects to my terrain board to go with the Building lights and Gaslamps I did, I thought I had better make a start...
I got a sheet of 5mm MDF and a 2" think sheet of polystyrene, cutting both to 48" x 48". I also got some 15mm dia plumbing pipe, with simple screw-fit connections, and made a start on a piped sewer system. I blanked off the ends of the pipe and added an upright to each that will just stick up proud of the poly sheet for now. This will be covered with a pastic mesh that will look like a drain cover...
The pipework will allow dry-ice to be pumped into the game, giving a foggy ground layer to the game.
Here's the pipework in place, on the MDF sheet.
I also used the pipework as a template to cut out the poly sheet...
Then the pipework was glued into place, and the poly sheet glued down around it. This will all dry overnight, giving the PVA glue a good chance to dry out. The books weigh it all down while it sets... I knew all those rule books, supplements, magazines and history books would be good for something! ;-)
While all that is drying... I finished off my 'smoke machine'... an empty 900g powdered food tin, a 2.5" 2nd hand computer case fan, a 9v battery cap connector was soldered to this, to power it up, glued to the plastic lid of the tin, that I had cut a fan sized hole in, so it blows down into the tin. An off cut of plastic pipe, and a bought piece of flexible pipe from the plumb shop, and we are ready to go... hot glue and insulating tape finishes it off...
...so this is all connected to the pipe 'sewer' system, via a screw fit straight connector... all I am waiting for is a test run...
...I need to get some dry-ice... the trick is, put some boiling water in the tin, drop in some dry-ice, put lid on and whack the fan on and, hopefully, hey presto - a smoke laden gaming board...
...for the chemically curious among you, the dry-ice, sublimes, i.e. goes from a solid, straight to a gas, missing out the liquid phase... to create a cold ground hugging fog effect... common to all those 70's pop group stage videos etc. and cheesy horror movies...
Warnings! - the dry-ice is seriously cold ( −78.5 °C), handle with thick gloves to avoid frost burns, oh and the gas is CO2, so open the windows too, to avoid hypercapnia!
If I get it all to work, I'll upload a video... fingers crossed!
Monday, November 18, 2013
Another summer, another annual challenge from Curt!
Summer is just around the corner for us Southern hemisphere types... and in the miniatures hobby world, that can only mean one thing; Curt's 'Analogue Hobbies' Painting Challenge...
I have taken part in the last couple years events, with varying amounts of output, but its always great to be part of the global challenge, no matter where you are placed at the end. There are some painters out there who can churn out vast quantities of quality figures, that I could only dream of matching in output, so for me its not about the winning, just taking part...
Whilst our northern cousins can take solace in the poor weather and long dark evenings, that are thus perfect for guilt-free indoors hobby painting, the challenge is exactly that for those of us in south enjoying the summer weather. But I guess that is in effect part of our challenge too, finding the time to squeeze in some time when possible at the painting table - almost praying for a wet weekend! ;-)
This year, Curt has widened the subject matter allowable to include sci-fi and fantasy, and that I think is a great thing, which I openly applaud! Nice one Curt - we are really in for a visual feast of varied submissions! And I can't wait to see what starts rolling in... you are going to have your hands full judging this lot my friend. But no doubt you have a few years practice under your belt to know how this is all going to run...
For myself, well I have a few things lined up as potential entry material... as always there will be 15mm Flames of War... also I have yet to start work on my Requiem Empire of the Dead figures... there are still 'tons' of LOTR/Hobbit figure backlogged stashed away to do... and there are some Foundry Saxons that are scheduled for possible SAGA service... So lots of scope for the paint brush...
However, a couple of caveats to my potential output... I still want to make more terrain for my Victorian London board for EotD, and that is time consuming work and beyond the scope of the challenge... on top of which, my father is visiting with us, from the UK, for a month over January/February, which typically will mean family activities together, and evenings chatting and imbibing a dram or three of whiskey... my liver has been in forewarned!
But that all said and done, we will do what we can!
So what my real output will finally be, it's hard to judge, but I have set myself a nominal challenge score of 600 points. Its at least, something to aim for!
Wish me luck.
And of course, best of luck to all the other participants!
![]() |
| This years challenge |
I have taken part in the last couple years events, with varying amounts of output, but its always great to be part of the global challenge, no matter where you are placed at the end. There are some painters out there who can churn out vast quantities of quality figures, that I could only dream of matching in output, so for me its not about the winning, just taking part...
Whilst our northern cousins can take solace in the poor weather and long dark evenings, that are thus perfect for guilt-free indoors hobby painting, the challenge is exactly that for those of us in south enjoying the summer weather. But I guess that is in effect part of our challenge too, finding the time to squeeze in some time when possible at the painting table - almost praying for a wet weekend! ;-)
This year, Curt has widened the subject matter allowable to include sci-fi and fantasy, and that I think is a great thing, which I openly applaud! Nice one Curt - we are really in for a visual feast of varied submissions! And I can't wait to see what starts rolling in... you are going to have your hands full judging this lot my friend. But no doubt you have a few years practice under your belt to know how this is all going to run...
For myself, well I have a few things lined up as potential entry material... as always there will be 15mm Flames of War... also I have yet to start work on my Requiem Empire of the Dead figures... there are still 'tons' of LOTR/Hobbit figure backlogged stashed away to do... and there are some Foundry Saxons that are scheduled for possible SAGA service... So lots of scope for the paint brush...
However, a couple of caveats to my potential output... I still want to make more terrain for my Victorian London board for EotD, and that is time consuming work and beyond the scope of the challenge... on top of which, my father is visiting with us, from the UK, for a month over January/February, which typically will mean family activities together, and evenings chatting and imbibing a dram or three of whiskey... my liver has been in forewarned!
But that all said and done, we will do what we can!
So what my real output will finally be, it's hard to judge, but I have set myself a nominal challenge score of 600 points. Its at least, something to aim for!
Wish me luck.
And of course, best of luck to all the other participants!
Saturday, November 09, 2013
Victorian Terrace #2 - Completed!
Finally finished Victorian Terrace #2 today, despite coming down with the lurgy earlier in the week and not really feeling like doing any hobby work. I visited the local apothecary, was prescribed a suitable potion, kept calm and carried on! ;-)
So without further ado, here's the completed building, all painted and lights in working order...
I decided to go with a different brick colour, after reading an interesting blog post on East London buildings by the Legatus, here.
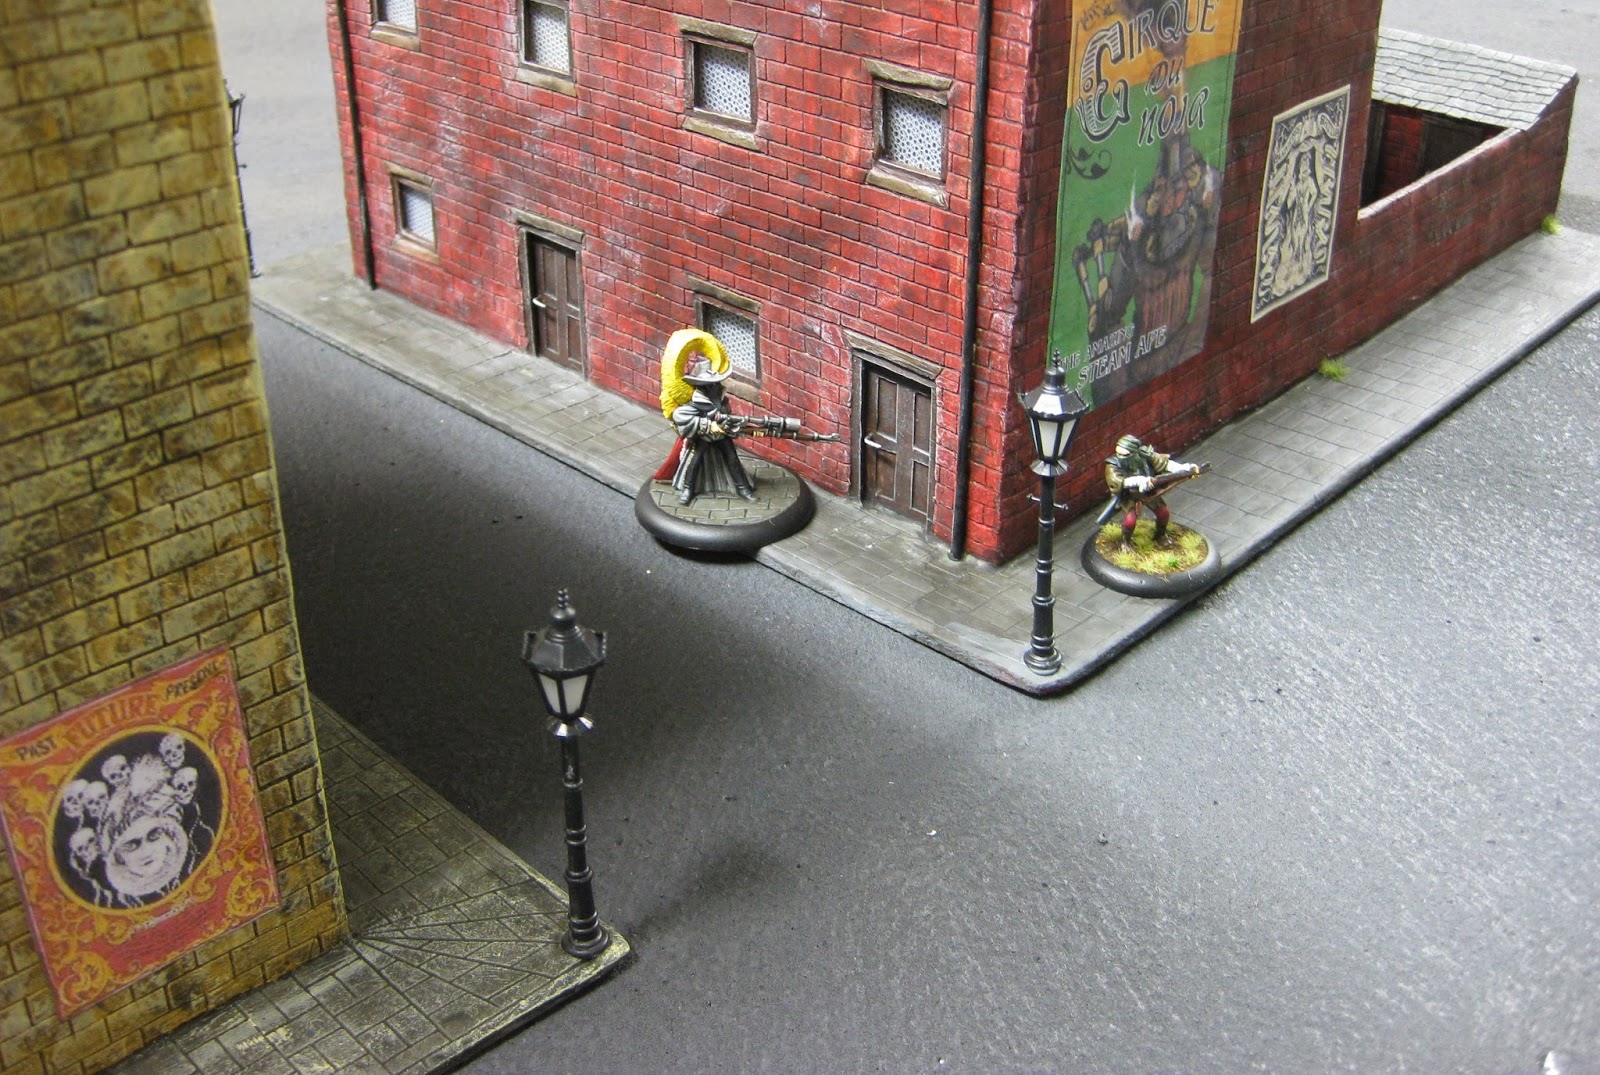
I also added some posters to the gable ends, some themed from EotD and other general Victoriana I found on the web.
I also added some grassy weeds to the rear yard, just to give it a little life and contrast.
Infernium, the fuel of the future, rumored to be the crystallized blood of fallen angels!
Some street scenes...
Having two buildings complete now means I can start to get some decent cameos, with one building providing the back drop to the other. As you can tell I also went back and added posters to the original red brick terrace building and again added weeds to its rear yard too.
Lights go on as twilight approaches (main room lights off, just display case halogens on)...sorry pics get a little blurry here, the camera struggles with the low light and shaky hand! Sorry.
Proper night time shots (room lights off completely)... very pleased with these, rather atmospheric I think!
And finally the two buildings together, on the 4' x 4' base board I made for goblin town. It will do till I sort out a board with a fully cobbled surface.
So final total build time on second house was 7.5 weeks. Much better than the 5 months the first one took me! But I did concentrate more purposefully upon it, once I knew Requiem was immanent and I had learnt a lot from building the first one...
What next then, I hear you cry? I need to clear the painting table, as its currently got some FOW begleit troops on it before I can make a start on the Requiem figures... And as for the next building... I am thinking about doing a corner public house...
So without further ado, here's the completed building, all painted and lights in working order...
![]() |
| Front view |
![]() |
| Side view |
![]() |
| Rear view |
![]() |
| Another side view |
![]() |
| Close up posters |
![]() |
| More posters |
Having two buildings complete now means I can start to get some decent cameos, with one building providing the back drop to the other. As you can tell I also went back and added posters to the original red brick terrace building and again added weeds to its rear yard too.
Lights go on as twilight approaches (main room lights off, just display case halogens on)...sorry pics get a little blurry here, the camera struggles with the low light and shaky hand! Sorry.
Proper night time shots (room lights off completely)... very pleased with these, rather atmospheric I think!
And finally the two buildings together, on the 4' x 4' base board I made for goblin town. It will do till I sort out a board with a fully cobbled surface.
So final total build time on second house was 7.5 weeks. Much better than the 5 months the first one took me! But I did concentrate more purposefully upon it, once I knew Requiem was immanent and I had learnt a lot from building the first one...
What next then, I hear you cry? I need to clear the painting table, as its currently got some FOW begleit troops on it before I can make a start on the Requiem figures... And as for the next building... I am thinking about doing a corner public house...
Friday, November 08, 2013
AliExpress refunded!
For those curious, I received my refund from AliExpress, on behalf of "Miranda Irene'" the seller.
Communication has been OK through the website, though admittedly their English was a little broken but I could get the meaning...
So I didn't get the cheap toys I hoped for, but didn't get stung either.
Not sure whether I feel like trying again...
Communication has been OK through the website, though admittedly their English was a little broken but I could get the meaning...
So I didn't get the cheap toys I hoped for, but didn't get stung either.
Not sure whether I feel like trying again...
![]() |
| A cheap Gaz? Close but no cigar... |
Saturday, November 02, 2013
Victorian terrace#2, WIP 10 - 'detailing'
Another couple of quick pictures, to show finished assembly, pretty much...
Clay clad the pavement and etched in the paving slab pattern... sand filled the rear yard area and added paving slab path... added Evergreen 'plastruct' for guttering, drainpipes and chimney pots... and some bent wire for door handles...
I have drilled the holes to take the Gaslamps at the front corners of the pavement...
But next up we are ready for paint...
Clay clad the pavement and etched in the paving slab pattern... sand filled the rear yard area and added paving slab path... added Evergreen 'plastruct' for guttering, drainpipes and chimney pots... and some bent wire for door handles...
I have drilled the holes to take the Gaslamps at the front corners of the pavement...
But next up we are ready for paint...
Subscribe to:
Posts (Atom)